User Guide

A complete guide to your solution.

Getting Started
Below are step-by-step instructions to activate your safe.


Ensure your Link account has been created.
Upon purchasing a safe, an email was sent to you that included a username, password and subdomain that you will need to gain access to the Admin Console.

Types of Safes
We offer two variations of our safes. One with Card, PIN, User ID, and Mobile access, and the other includes all access methods plus biometric fingerprint access.

FINGERPRING-SAFE

Fingerprint / Card / PIN / Mobile Access

Safe-No-Fingerprint

Card / PIN / Mobile Access

Activating the Safe

For this step, a laptop or smartphone, the Link Device, and internet connection is required. The Link device will be activated by adding it to the BioConnect Link Console.

Powering the Safe

You will be powering the Link device using 12VDC.

Adding a Link Device to Account

1. On a desktop or mobile device, open a browser and navigate to the Link Console.

2. Enter Login Information

Tip:

Login information can be found in the email that was sent after purchasing. Search your email inbox for 'BioConnect Link' to locate it.

Login-Screen

3. Navigate to the 'Device Management' page.


Device-Management

4. Select 'Add Device'.


Step-4-2

5. Select 'Safe'.


Add-safe

6. Enter the 12 digit key located beside the QR code sticker on your hardware and then click 'Continue'.


Mac-address

7. Give a description name for this safe.


name-safe

8. Select your safe authentication settings.

Mac-address

9. Once added, be sure to enable the device.

Screenshot 2025-02-12 at 7.38.10 PM

Configuring the Device

Each device should be configured for how you want your users to authenticate their identity.

1. Select the 3 dotted menu on the device you want to configure and click 'Settings'.

Screenshot 2025-02-12 at 7.38.52 PM

2. Navigate to the 'Authentication Method' tab at the top.

Screenshot 2025-02-12 at 7.39.17 PM

3. Select the 'Primary Authentication' drop down and choose how you want users to authenticate, and select 'Save Settings'.

Screenshot 2025-02-12 at 7.39.56 PM

Device Alarm Set Up (Optional)

Overview

For safes, it is particularly valuable to configure an alarm that sounds when a door is held open for a certain length of time. This is a global setting and will be configured across all your safes.

1. Navigate to the 'Settings' page.

2. Select 'Device Alarm' tab.

3. Choose the desired length of time and select 'Update'.

By default, the alarm is off.

TIP:

To disable the alarm, set the alarm to 0 minutes.

Screenshot 2025-02-12 at 7.40.50 PM

Adding a User

1. In the Admin Console, navigate to the 'User Management' page.

2. Select 'Add User'.

Screenshot 2025-02-12 at 7.41.32 PM

3. Enter the user's information: first name, last name, email and authenticator name.

Screenshot 2025-02-12 at 7.41.37 PM

4. Set Admin Role. Most users will be added as a basic User. However, if your user requires additional access, you can set specific roles. 

Group Administrators can manage groups.

Account Administrators have full acecss to the Link Admin Console. 

NOTE:

If a user already exists, you will not be able to set their password. The user can access the console by selecting 'Forgot Password' on the login page.

Screenshot 2025-02-12 at 7.42.05 PM

5. If you would like to add a Card or User ID, select 'Add Credential'. 

NOTE:

You can also do this later on - see the 'Access Methods' Section below.

Screenshot 2025-02-12 at 7.42.13 PM

6. Add credential.

To add a card, tap the card at your device and select the 'refresh' icon on the Link Console.

To add a User ID, enter a unique User ID (4-6 digits) at your device and press enter. After entering the User ID, select the 'refresh' icon on the Link Console.

NOTE:

If your safe is equipped with an LCD screen, when you tap your Card or enter a User ID, it will say 'Denied' until the credential is added.

7. The system will search for the most recent transactions, where you will see the transactions. Once you've located the correct transaction, select 'Add'.

Screenshot 2025-02-12 at 7.48.25 PM

Access Methods

After your safe has been installed, your software has been configured, and your users have been added, you can now manage your users and credentials.

Adding a Card to an Existing User

1. Have your user scan their card at the safe.

2. Navigate to the Link Console 'User Management' page and select the user.

3. Select 'Manage' and then select 'Add Credential'.

4. The system will search for the most recent transactions, where you will see the transaction from your user’s card. Once you’ve located the correct transaction, select ‘Add’.

TIP:

There are a few ways to ensure you are selecting the correct transaction:

  • Review the time stamp of the transaction to ensure it matches with the card was scanned. The most recent transactions appear at the top.
  • Review the door details – if you know the door that the card was tapped at, you can verify it in those columns.

Adding a User ID to an Existing User

1. Enter a 4-6 digit User Id code on the device PIN pad that is unique across the system and then press ‘Enter‘.

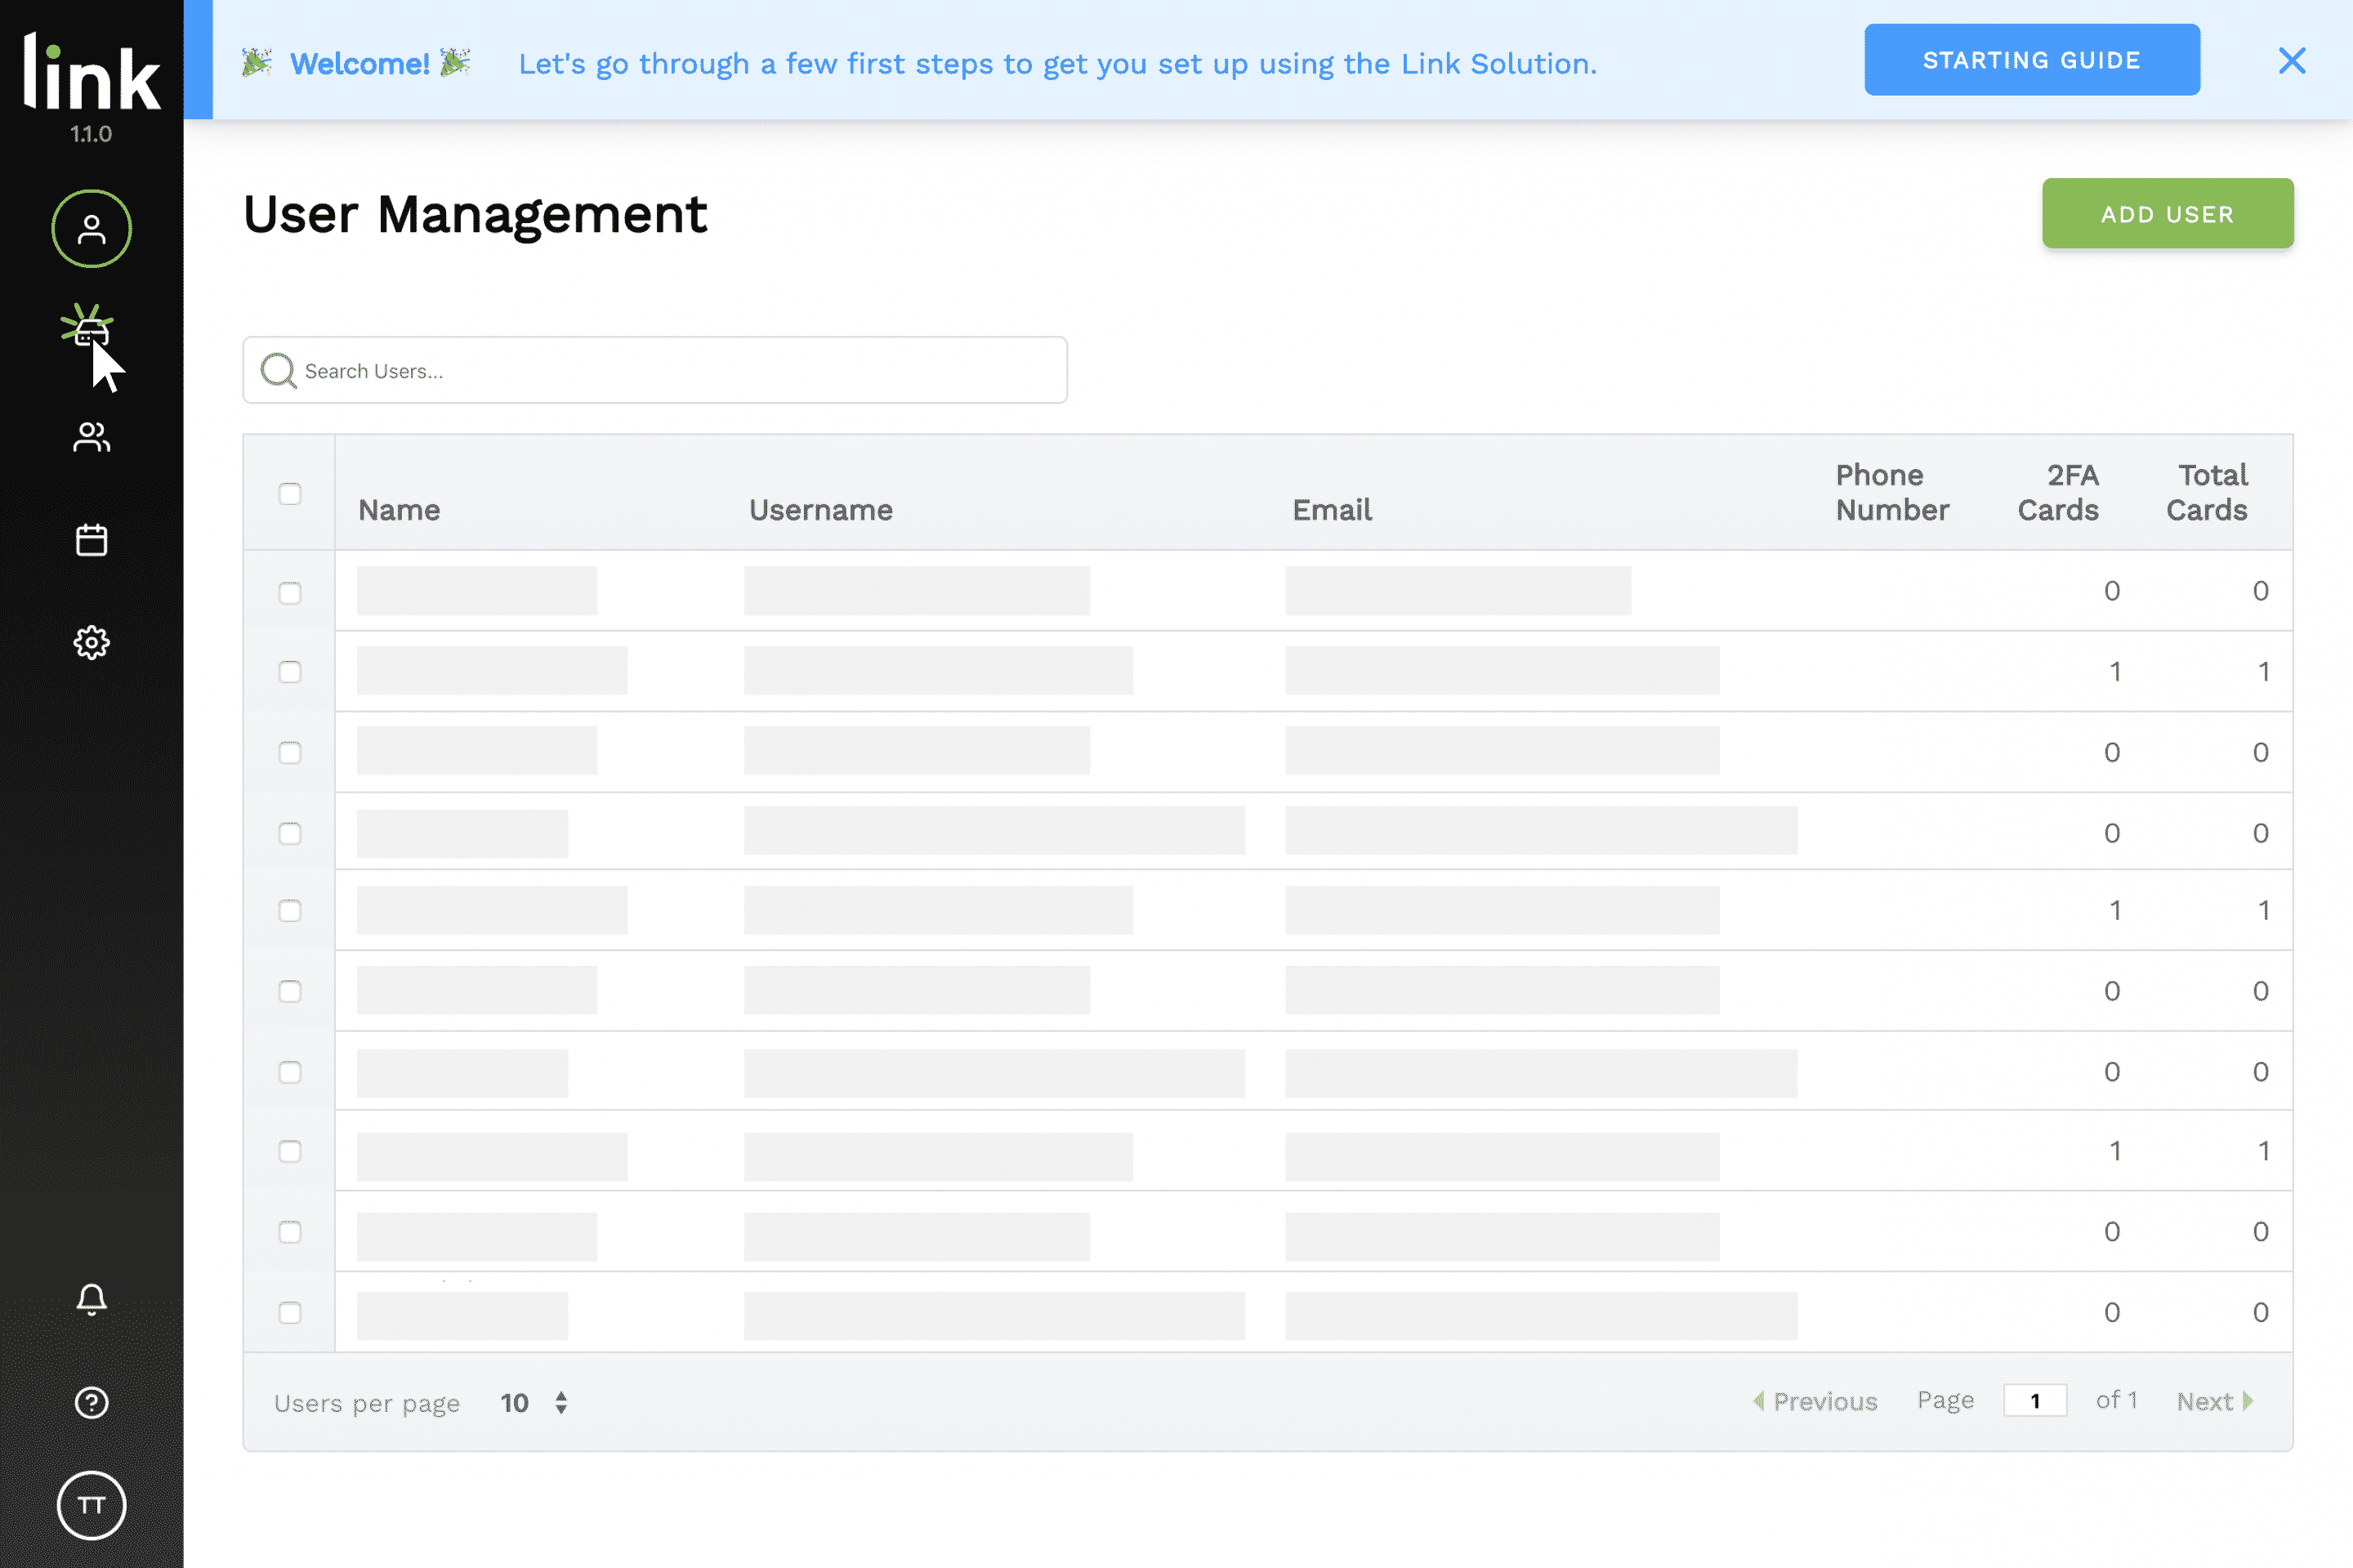
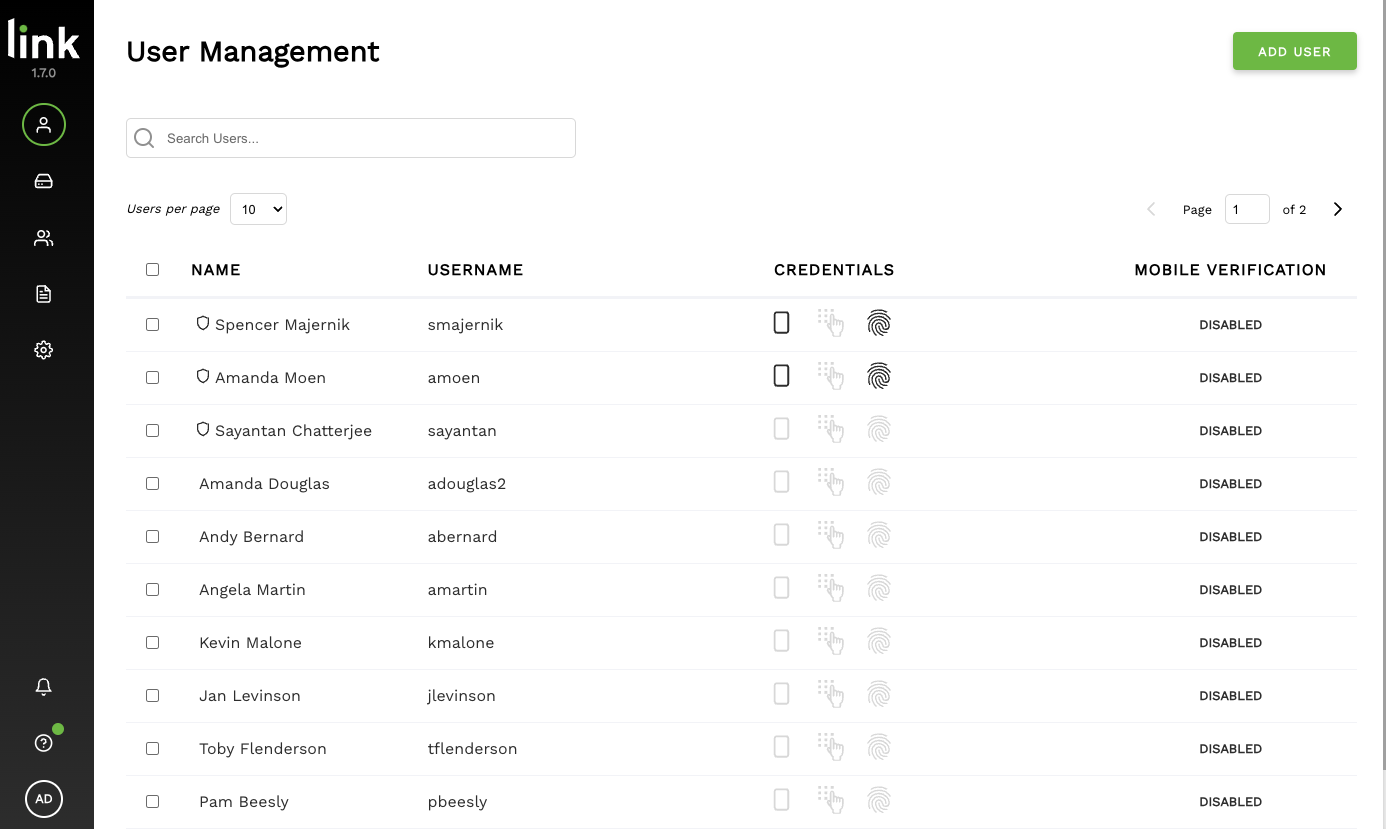
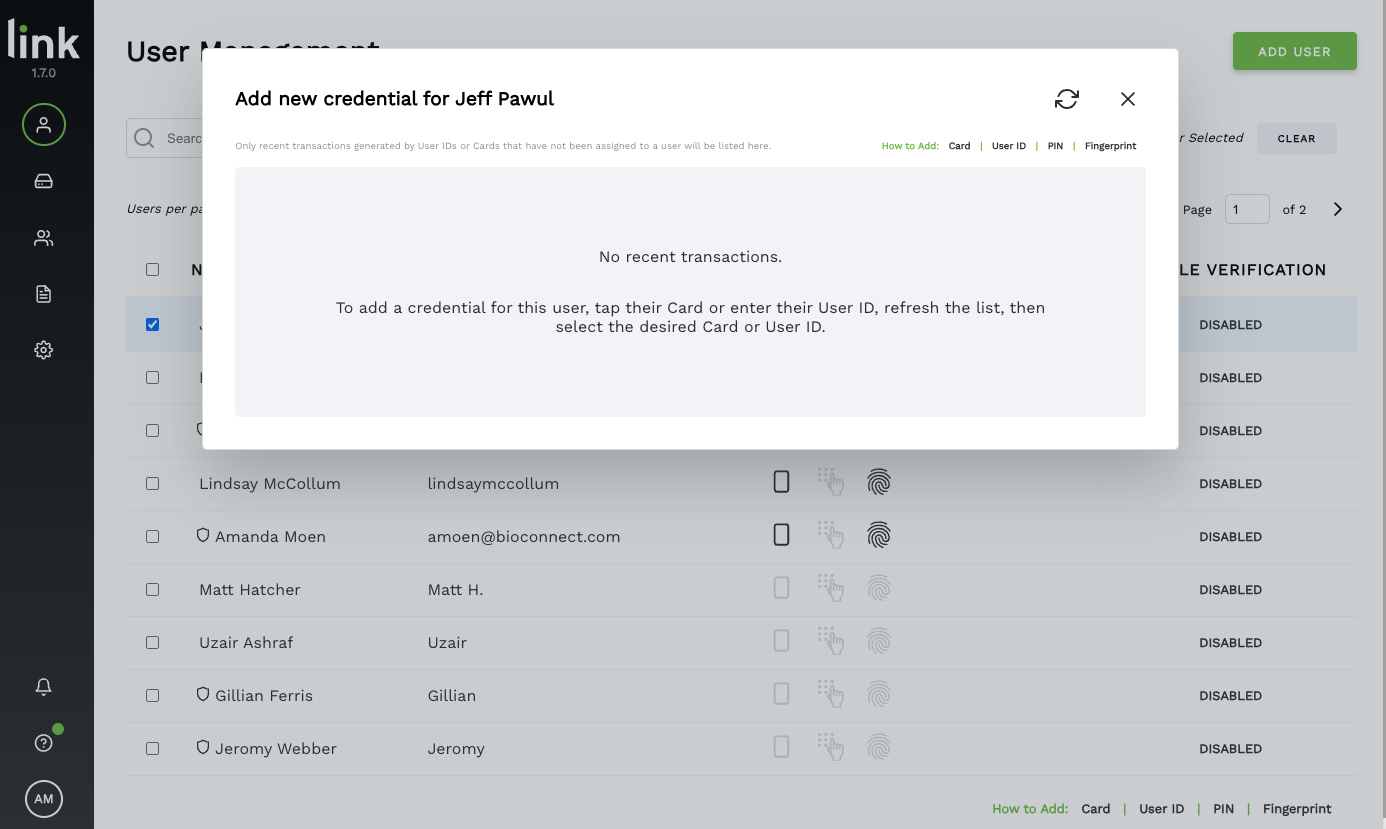
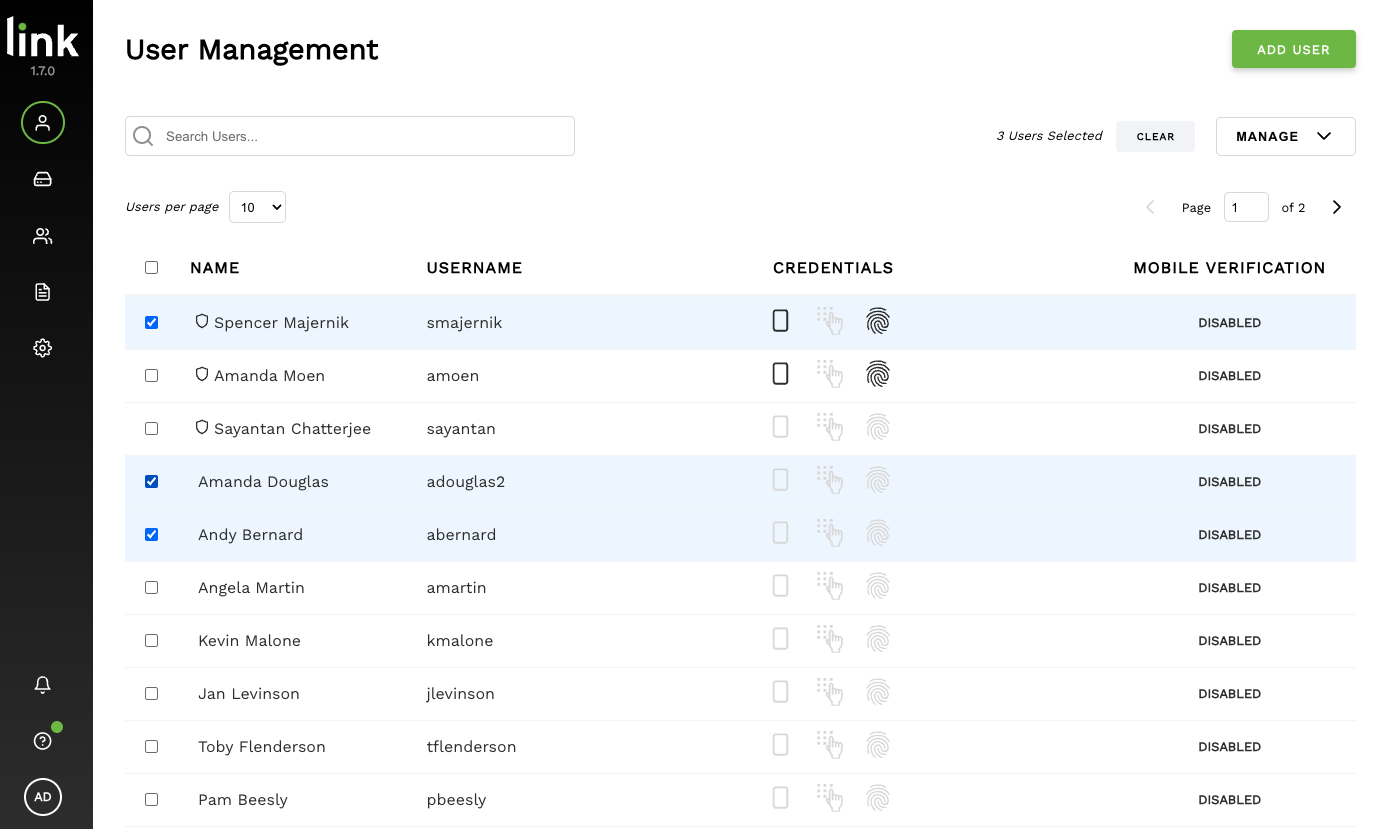
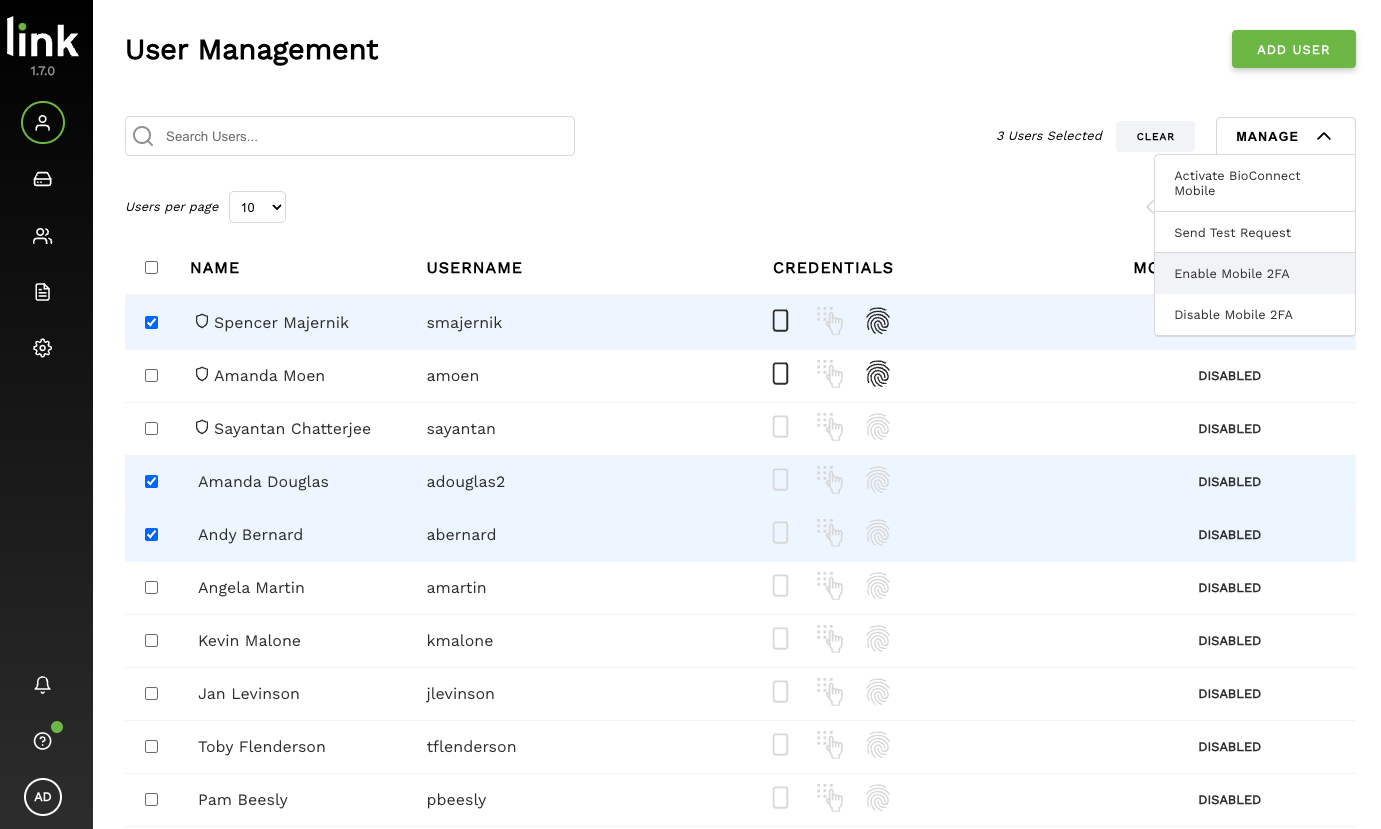
2. Navigate to the BioConnect Console ‘User Management’ page and select the User you would like to add this User ID to.

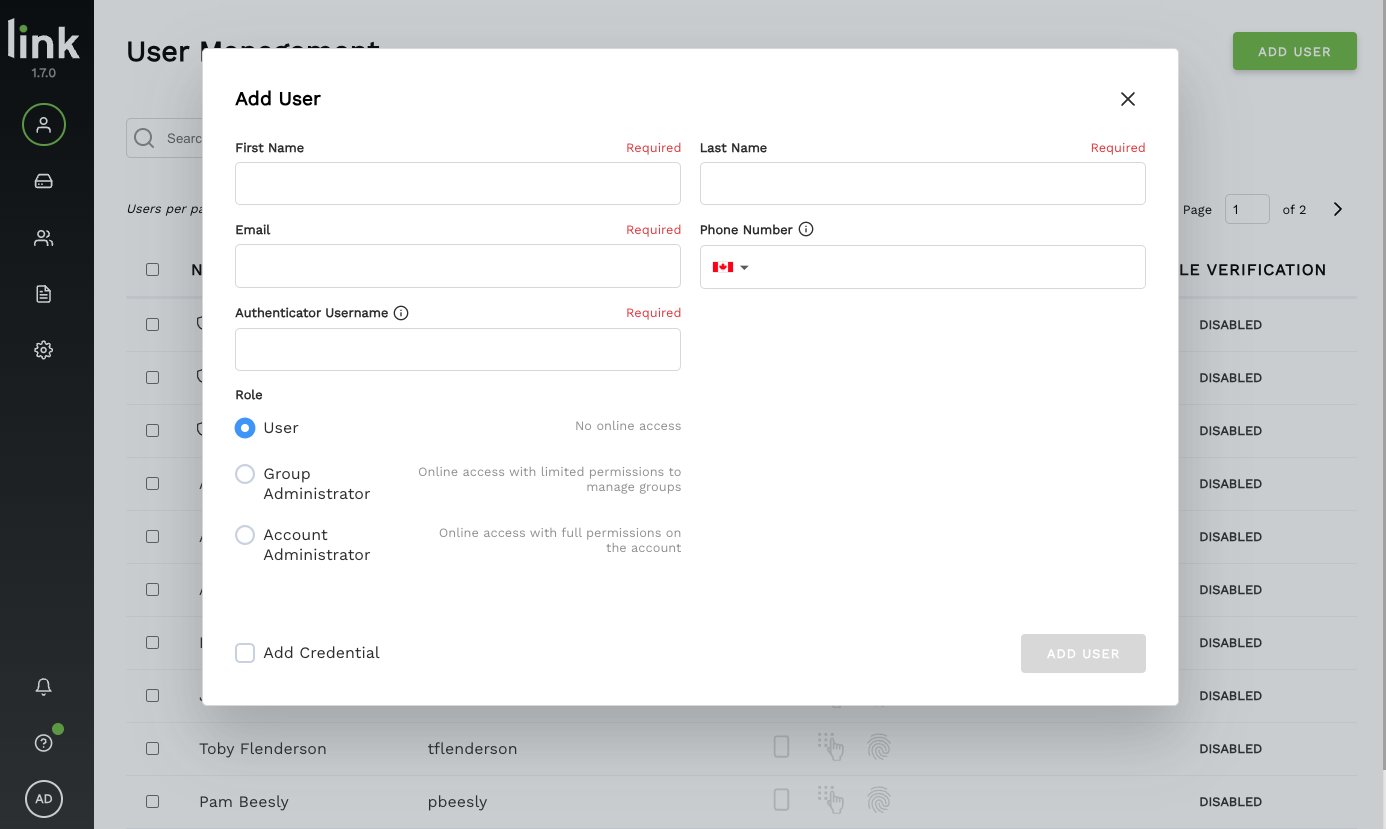
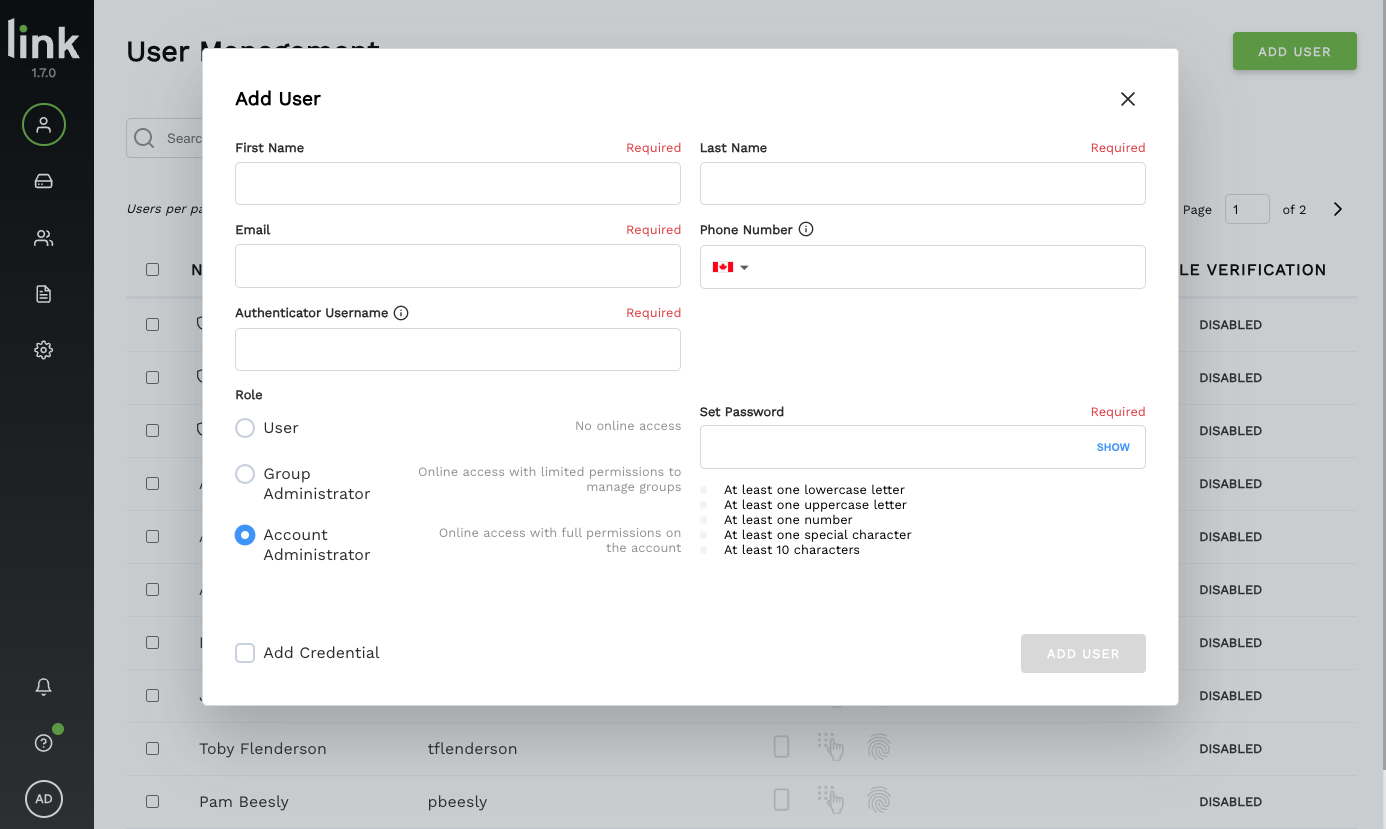
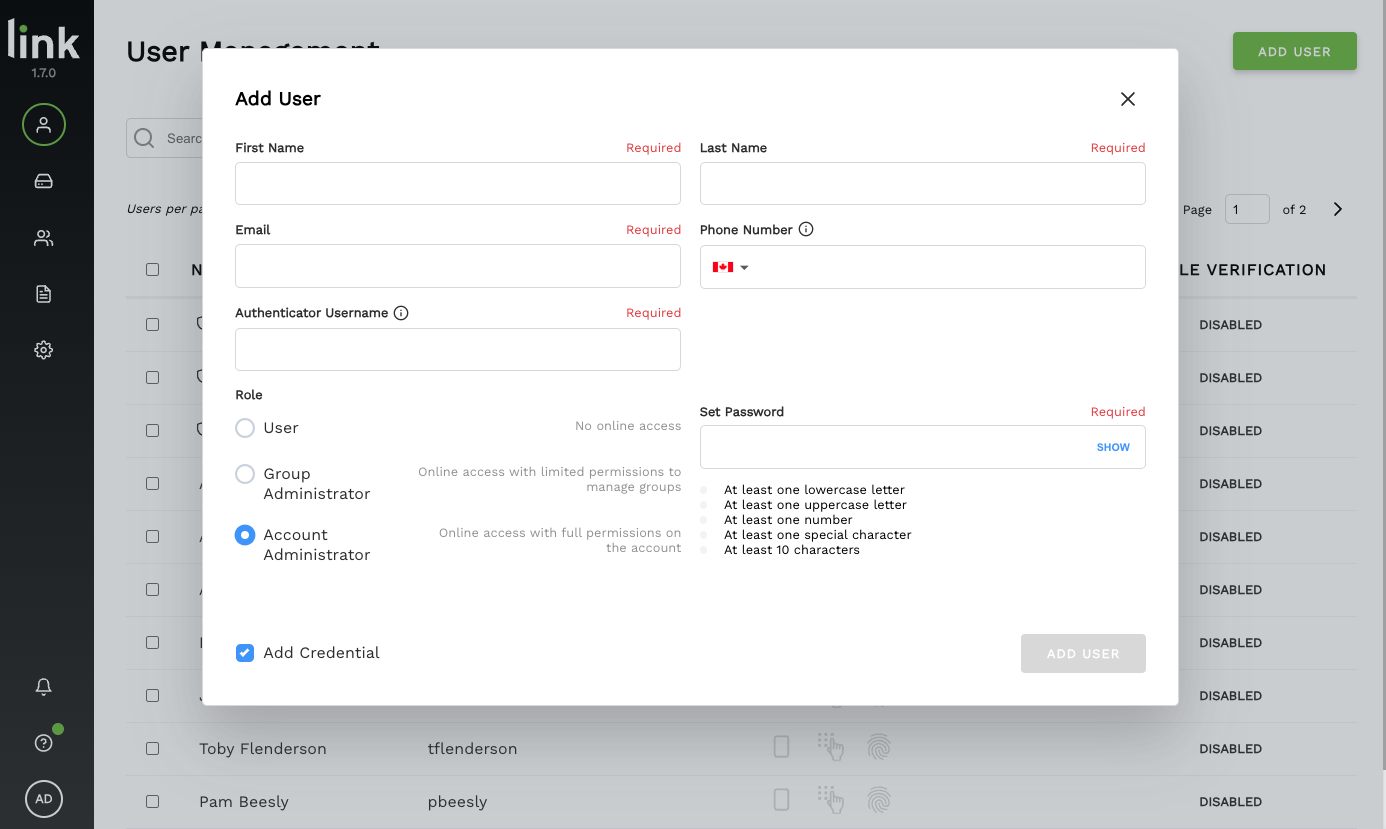
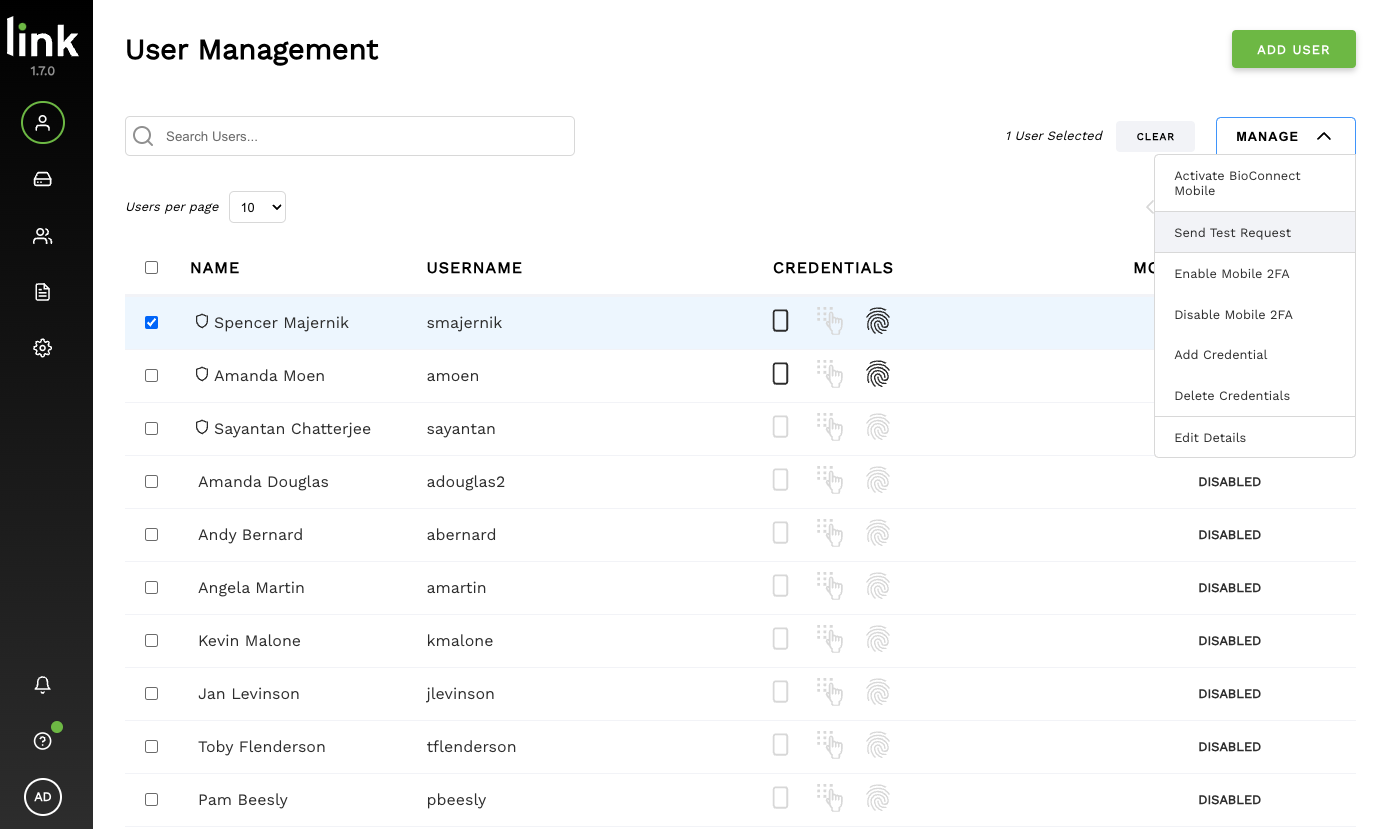
3. Select ‘Manage’ and then select ‘Add Credential’

The system will search for the most recent transactions, where you will see the User ID appear as an unknown card.

4. Confirm the time is the same time as when the User ID was entered, and select ‘Add Card’.

Adding a PIN to an Existing User

A PIN is a 4-6 digit secondary authentication method used in combination with a Card or User ID. Ex. a user can tap their card and then enter a PIN code to authenticate OR they can enter a User ID and then a PIN code to authenticate.

NOTE:

A user must have a Card or User ID enrolled before they can create a PIN.

IMPORTANT:

Ensure that your safe is configured for PIN Access. See ‘Configuring an Existing Device‘ section above.

1. User enters their User ID OR taps their Card at the safes PIN Pad and presses ‘Enter‘. 

Reader LED should flash rapidly blue and green.

2. User enters the PIN once and presses ‘Enter‘.

Safe will beep.

3. User enters the PIN for a second time and presses ‘Enter‘.

Safe unlocks.

Adding a Fingerprint to an Existing User

A fingerprint can be enrolled and used on its own or in combination with other access methods such as a Card or User ID.

NOTE:

A user must have a Card or User ID enrolled before they can enroll a fingerprint. 

IMPORTANT:

Ensure that your safe is configured for Fingerprint Access. See ‘Configuring an Existing Device‘ section above.

1. a) If you are using a card to enroll your fingerprint, tap the card at the device.

b) If you are using a User ID to enroll your fingerprint, Enter the User ID and press #.

Reader LED should flash rapidly blue and green.

2. User will be prompted to place and lift their fingerprint FOUR times on the scanner to complete their enrollment.

Safe will beep and door will open.

How to use Remote Authorization

1. Select the desired device and choose ‘Remote Authorize Open‘.

Screenshot 2025-02-12 at 8.00.36 PM

2. Select ‘Display Code‘.

3. If you have an HID Device (most common), enter * # # # into the device followed by the 6-digit code that has been entered. See Instructions within the console for other device options.

Screenshot 2025-02-12 at 8.00.40 PM

Group Management

After your users have been added to the system, you can now create groups to manage alerts and notifications for specific users and devices. Groups allow you to select a group of users that can access specific devices.

How to Create a User Group

1. In the Link Console, navigate to the Group Management tab and select ‘Add Group‘.

Screenshot 2025-02-12 at 8.01.56 PM

2. Enter the fields required: Group name, Description, and the desired users to receive alerts for this particular group – and then click ‘Continue‘ to proceed.

Screenshot 2025-02-12 at 8.03.43 PM

3. Select the desired users to be added to this group and then select ‘Continue.

Screenshot 2025-02-12 at 8.04.43 PM

5. Review the group details and select ‘Add Group‘.

Screenshot 2025-02-12 at 8.04.53 PM

After the group has been added, it will now appear on the group management screen.

Screenshot 2025-02-12 at 8.06.43 PM

Mobile Authenticator Set Up (optional)

Overview

Your MedixSafe solution comes with an option to provide an additional level of security using a mobile device as a step-up authenticator or you can integrate an existing mobile authenticator if your organization uses one today. You are also free to not activate this optional feature and use the Card / PIN options. 


1. In your browser, navigate to the BioConnect Link Console and login using your credentials.

2. Navigate to the ‘Settings’ page.

Screenshot 2025-02-12 at 8.07.18 PM

3. Select your authenticator and enter the required credentials to activate your authenticator.

NOTE:

If you do not currently use an authenticator, select the ‘BioConnect’ authenticator.

4. If you choose to use the BioConnect Mobile Authenticator, you have the option of using either a ‘Simple Yes/No’ Authentication or Biometric Authentication.

 
NOTE:

If you are using BioConnect Mobile, please remember to activate it before enabling Two Factor Authentication.

Screenshot 2025-02-12 at 8.07.41 PM

Configuring a Two Factor Authentication Schedule (Optional)

If you have set up a mobile authenticator, you can set a schedule for when two-factor authentication is enabled. Customers often use this feature as an extra level of security during non-business hour access.

1. In the BioConnect Console, navigate to the ‘Schedule’ page.

2. Select ‘Set Schedule’.

3. Enter the start date and end date that you wish to enforce step-ups.

4. Enter the start time and end time that you wish to enforce step-ups.

5. Select ‘Set Schedule’ to save your schedule.

NOTE:

Your schedule will appear at the top of the screen, review this to ensure you have properly set your desired schedule.

IMPORTANT:

Users have NOT yet been added to the schedule – meaning, they will not receive step-ups until you enable them. (See below to enable users)

Screenshot 2025-02-12 at 8.11.04 PM

How to Enable Mobile Step Up for Users

1. Choose the users you wish to enable step up for by selecting the check box beside their name.

TIP:

To enable users in bulk, select the top checkbox located beside ‘Name’ in the header column (as shown in the image below). This will select all users on this screen. If there are multiple pages, this must be replicated for each page.

Screenshot 2025-02-12 at 8.12.52 PM

2. Once you’ve highlighted your user(s), click on the ‘Manage’ button and select ‘Enable 2FA’ from the drop-down list.

Screenshot 2025-02-12 at 8.13.08 PM

Verifying Step Up is Enabled

Once your device has been installed, software configured, and your users and cards have been added, you can test to ensure your step up is working.

1. In the BioConnect Link Console ‘Users’ page and select a user to test.


2. Press the ‘Manage’ button and select ‘Send Test Request‘ from the drop down list.


3. If the test user receives their step-up notification to their device, step-up has been successfully enabled.

TIP:

The selected user must have step-up enabled cards.

Screenshot 2025-02-12 at 8.14.14 PM

FAQs

My internet connection is unreliable. Will the safe still work?

Yes, MedixSafe has an offline mode that ensures access even when the internet is down.

What happens if a user forgets their ID? Can they still access the safe?

Yes, users can regain access through Remote OTP (One-Time Password) or by enrolling an alternative authentication method.

Do I need to enroll users individually for each safe?

No, with the Link portal, you can enroll users centrally and assign them to one or multiple safes. This streamlines the process and ensures consistent access permissions.

I have users who struggle with biometric authentication. What are their options?

Users can use a PIN as a fallback authentication method.


Can I control which safes different users have access to?

Yes, you can assign users to specific safes by creating user groups.

Can I customize access permissions for individual users or groups?

 Yes, you can configure customized access levels based on user roles and requirements.

Statutory Declarations of Conformity